Time Saving Pro Tools Tips

I’m sure that most Commercial and Imaging Producers could agree that if there’s one thing they could use more of, it would be time. It seems like every job is ultra urgent and needs to be on air yesterday. I’m always looking for quicker ways of doing things to give myself more time to concentrate on the creative side of things, which is why I became a producer in the first place.
Here are my top 10 time saving Pro Tools tips.
-
Label everything
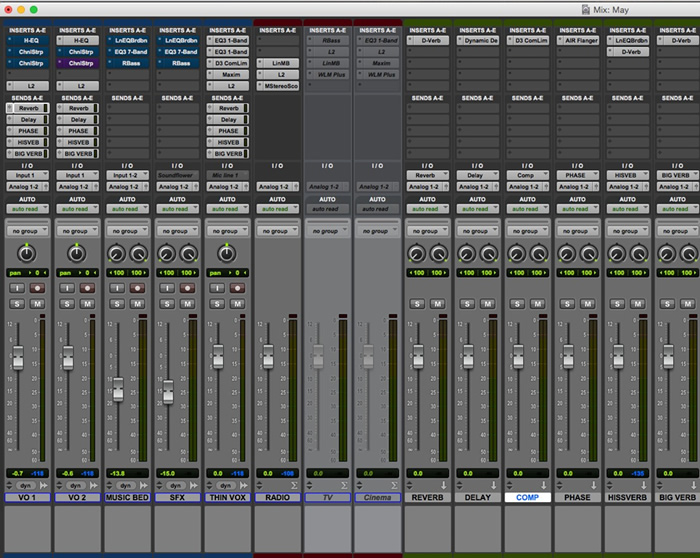
When you are an Audio Producer it pays to be anal. Spending a little bit of time labelling each channel and send can save a heap of time and confusion down the track. But I get the most benefit from correctly labelling my sound effects. Never just name an audio file ‘sfx 1’or ‘rain fx’. Try and be a bit more specific e.g. ‘Rain on Roof Strong Wind Thunder’ so that next time you are searching for the perfect sound file you only need to type in a few keywords rather than auditioning 20 tracks
2) Use Aux Tracks
Although Aux Tracks can be a little confusing at first they can make things very simple once set up correctly and give you the freedom to tweak fx down the track. Aux Tracks are great for adding delay, reverb, phasing, extra compression etc to a voice over. Lets say that you have mum, dad and daughter all standing in kitchen talking about a fantastic shoe sale that is on this week only and you want them to sound like they are all in the kitchen.
-
Create a new stereo Aux Track (label it!)
-
Send all three voice over tracks to a free stereo bus (label it!)
-
Set the input of the Aux Track to the same stereo bus.
-
Add a your favourite reverb plugin to the Aux Track (under inserts)
You can now adjust send level to control how wet (how much reverb) you want on the track and copy over to each voice track or tweak individually. Later in the mix you might decide that once you add music and sfx it sounds too wet or too dry, you can then easily adjust the send level to achieve the right mix.

3) Create a Template
It can be very time consuming to open a blank session and add each track, then insert EQ’s and compressors etc. I use a template that has my typical setup. I even have a few plugins and sends that I use regularly bypassed that I can un-bypass when required. All my settings are for an average job, which can then be tweaked as I start mixing if need be. I’m continually updating my template as I find better ways of doing things.4) Shortcuts
Every producer loves discovering new shortcuts. Here are some simple ones that I use every time I mix (on Mac): -
3 (on the number pad) = Start recording
-
Command/Z = Undo
-
Shift/Command/Z = Redo
-
Option/Command/G = Group selected section
-
Option/Command/U = Ungroup selected section
-
Shift/Option/3 = Consolidate selected audio
-
Command/S = Save session
-
Shift/Command/I = Import audio
-
Shift/Command/K = Export Audio
-
X = Cut
-
A = Cut the clip to the left of the cursor
-
S = Cut the clip to the right of the cursor
-
Option/Command/B = Bounce
-
Command/Click on an insert or send = Bypass
Just remember that ‘Option is generally a do to all key e.g. holding down option and changing the track view selector to volume will change all tracks to volume. More great shortcuts can be found here.
5) Use Markers
Adding markers (shortcut=Enter) to a busy session is a great way to keep order or plan where to start and stop music or sfx. Lets say that a local rug store is having a closing down sale and everything must go! They would like five spots made up: the sale is coming on the 19th, the sale is on this Saturday, the sale is on tomorrow, the sale is today and of course the good old the sale was so big yesterday we’ve extended it for one more day of price slashing craziness. If these aren’t marked correctly your session can easily get very confusing.
Another handy tip is to start each spot at the start of each minute in the timeline so you can easily tell how long it goes for. for example if you start a spot at the 2minute mark and the audio runs to 2minutes 27seconds you can easily tell that the audio is running 27seconds and you may need a slower read.
6) Nudge
While your in the edit window at top of your screen right in the centre is a little window, in there you’ll find nudge. This handy little tool is often under utilised. To the right of the word nudge you can adjust the nudge value. Once you have done that use the + and – keys to move the cursor or selected region forward or backwards. Perhaps you would like to put down a marker every minute for five minutes, set the nudge value to one minute and using the + and enter keys this can be done very quickly. Maybe your having trouble syncing a sound effect up to TVC, set the nudge value to a few thousands of a seconds to help you get the sync just right.
7) Use the Trim Tool to make time adjustments
Almost daily I’m required to adjust the speed of a voice over or music track to fit in with the allocated timing.
Holding down the clicker on the mouse over the Trim Tool will give you three options – standard, TCE and Loop. Clicking on TCE will change trim tool to a time adjusting tool allowing you to stretch or squash an audio clip quickly and easily with the mouse.
At first I didn’t use this tool much because I found the end product didn’t sound very clean but I have since realised that if you go to set up>preferences under the processing tab you can change plugin used, you can even select your favourite settings.
To give you even more control try using TCE Trim Tool in spot mode. You can then select the exact end time or duration of the clip.
8) Clip Gain
Since Pro Tools 10 we’ve able to use clip gain to quickly and easily balance out a mix. But many people don’t realise that rather than using the little fader in the bottom left hand corner of each clip you can simply select a clip and adjust the clip gain by holding down shift and control (on a mac) and scrolling up or down. You can even select multiple clips and adjust their gain by the same value at the same time. I find this really handy when I’ve built a sound effect or ambiance using multiple sound files and get it to where I’m happy with how it’s sounding but when I add voice over over the top I find my levels are too loud or too soft. I can then easily select all the clips and adjust them all together to keep the original balance.
9) Use the scrolling wheel on the mouse to zoom and scroll
It’s a simple one but a good one. Hold option while scrolling on the mouse to zoom in and out quickly and use shift/scroll to scroll left and right through you project.
10) Tab to Transient
When making an awesome music promo it’s important to edit on the beat and it can be quite fiddly finding exactly where the beat kicks in. Make sure you have Tab to Transient on (under the smart tools) and once you’ve found the beat you would like to edit on, place the cursor just before where it looks like the beat spikes. Hit the tab key and the cursor should (it doesn’t always work perfectly) jump to the exact start of that beat.
Do you have any Pro Tools that help you work more efficiently? Please share them in the comments section below.


